An HGTV Showdown on M/V Angelique, Before and After Results…#25

There is something so gratifying and heartwarming when I’m sitting in a room that has its own personality. It can quietly speak to me, with a warming energy that makes me what to sit and enjoy the view and style in comfort. This article is one for the girls… not that the guys won’t enjoy it because the transformations are just amazing.

As Dan did on our last blog A SHIPYARD STORY –> What it Takes to Keep a Big Hatteras Going….#24 , I’m going to start at the beginning with my honest opinion of what she looked like and my reaction of my first visit. When we bought “Sheer Luck”, as she was named. She was located Alameda, California. I was still working my IT job, so Dan took a trip to see her alone. We had been looking for over a year and had made multiple offers on different boats from California to Florida. For one reason or another they just didn’t work out.  Dan came home from this trip and was very excited, so we made an offer. We discuss and knew she needed some work. The offer was accepted and during the survey process I flew down with Dan to see her for the first time. When I walked in to see her, I was shocked and disappointed. I had a very upset tummy and did not think that she could ever be something I would be comfortable in. Dan promised that I could redo & remodel her as I saw fit. So I tentatively said ok.

Dan and I both loved Hatteras yachts, the classic lines, beautiful wood and enough room spaced out in a fashion that we preferred. This yacht had no wood other than non-original cabinets that were cheap and didn’t give me the sense of warmth and welcoming. Along with not much useable storage. The decor was all beige… I was having an issue envisioning anything other than a gut job.

The very first Hatteras Dan and I toured is now owned by our friends Loren and Stephanie, “Cat in the Hat” (I was in LOVE) The previous owners had put a lot of money into remodeling her and it was gorgeous. Our Hatteras had some of the key factors we were looking for but all the wood had been painted white years ago. We found out she was used as a charter boat in the Caribbean Sea for years.  Just prior to this endeavor she had a major remodel and they painted walls, doors and stateroom cabinets. We found pictures to show you what she looked like back in the 90’s.


I started to work on “my new vision” of what she could be. The majority of the remodeling was going to be in the salon.  Everything except the headliners and mirrored wall was demolished.  I really don’t remember how my vision started, except that beige carpeting had to go. It took Dan and I a few months to find and decide on the replacement floor. We didn’t want it to look too different from the beautiful teak in the galley and helm area. So tongue and groove teak was sourced from East Teak in Sultan WA. We got encouragement from our friends that we could lay and finish the floor ourselves. We hadn’t done it before but Dan and I were hard workers and willing to try. We could save thousands of dollars by doing it ourselves. So we did. It certainly wasn’t easy, but we have a grand story to tell about our efforts. We are really happy with the way it looks.

Next was the cabinets. I contacted a couple different yacht cabinet builders, ultimately ended up with Oregon Custom Cabinet in Canby Oregon. They hadn’t done anything like this before and I’m sure they learned a lot. With all the angles of a boat, nothing is straight.  After taking out the carpeting and previous cabinet we could see where the original cabinets were. I decided to go back to a “close to original” layout. They turned out awesome and we are really happy with the look, style and function of the cabinets. I had wood tops put on rather than a hard stone surface. I felt the room needed as much wood accents as possible because the teak walls had been painted.

Next was the walls. Wallpaper is a risk, because mold can grow in places that you can’t see. I wanted to have a conversation with an expert before deciding. In Portland there is only one location where you can actually see wallpaper books and talk to an expert, Miller Paint Store. I purchased a primer that is mold resistant and real looking  vinyl grasscloth wallpaper. (which looks very real, if I might add) Real grasscloth can easily grow mold too, so vinyl was a must! I installed it myself with a bit if “holding” help from Dan and Clark (our friend). We are so grateful for all our friends that helped us. Couldn’t have done it without you all!

The Wood Vinyl covered valance header boards over the windows were calling my name. I think Dan thought I was crazy!! Dan helped me take them all down. I knew I was either going to have wood headers or recover them with a better fabric. When I uncovered one board, there was real teak wood that was beautiful under the years of fabric.  But with the 3+ layers of fabric and the thousands and thousands of staples that I needed to pull. They left large holes and some were rusted. The boards were not in good shape. Choices are complicated. Do we buy new teak wood boards, cover with a different fabric or pull all staples and cover with teak veneer. Of course I pick the hardest, but cheapest choice. I pull 6000+ staples out of 5 boards. Then Dan and I did something again we had never done, we veneer the boards ourselves. They turned out pretty good for our first attempt.

To finish off the salon I only had furniture, blinds and rug remaining. I knew I wanted blues and greys. We are pretty happy with the result!


↓↓↓ Reminder of what it looked like before ↓↓↓


One of the other areas that was very important to me was the back deck before you walk inside the salon. We named it the “Sapphire Deck”. This area is the first living area you hit coming on to the boat. I felt like it was a tunnel. It had two built-in benches, two huge built-in tables and a hidden bar. I didn’t even know the bar existed until I uncovered it. It was  full junk that the previous owner had on top of it. We removed one table and one built-in bench to make room for a couple rattan type chairs, ottoman and a rug. This also allowed for more open space and easier access to the bar. Along with different pillows to change the mood on the built-in bench, along with adding more comfort. The small black and white pillows were not supportive enough. BTW… I made the 10 pillows while underway with sunbrella I purchased before leaving. 

img_1303-1


If you are following along our blogs you know we are in the shipyard getting months of work done. A couple additional items that is getting done along with the painting and mechanical stuff is varnish and new upholstery for the cushions. I will have before and after pictures on the “splash down” blog when we finally get all the work done and able to show you all the beautiful pics of our boat!


In process pictures below

6d217f8b-c173-415d-a387-2012b3ceb778

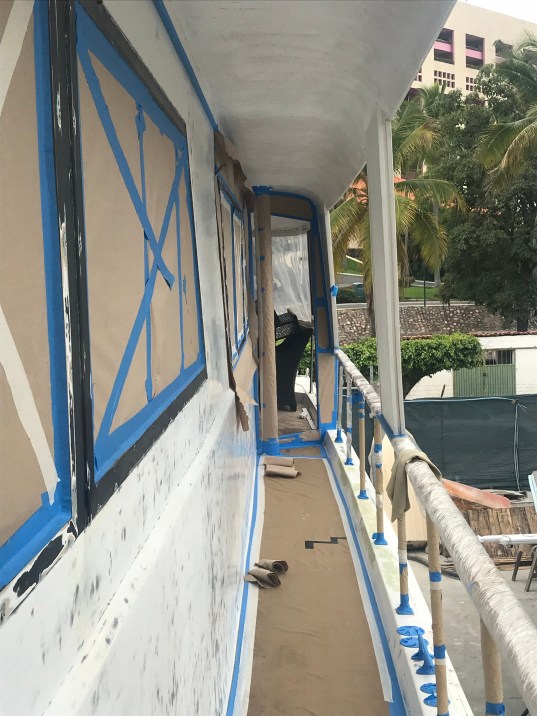
The bolsters are also getting new vinyl to match the new white paint!


As I write this article we are in the count down stages. I’m pushing to get all the work done by end of Feb. We will still have work that remains once the boat is back in the water. But it will be mostly putting everything back together. Benches, tables, furniture, side panels, supplies and etc that had to get moved while all the painting was happening. I will also have a big cleaning effort to do too, as the dust is horrible in the yard. They will also finish up the varnishing of our outside railings in the water too.

We are excited to get back in our home, Angelique & share our final pictures with you in March. As always we are eager to have our friends and family visit us too.

Next blog “SPLASH DOWN @ Opequimar” 

A SHIPYARD STORY –> What it Takes to Keep a Big Hatteras Going….#24

“Groundhog Day Again”

Each morning as Dan and I ride our bicycles into the shipyard, we see some of the same sights. Our team of workers running around getting ready for their day. Flip flops and bare feet are a common sight. Some change clothes under the boat, putting their yucky, sandy clothes back on from the day before. “Hola, buenos dias” we call to each other as we pass. Making sure they know how appreciative we are for their hard work. It’s difficult to believe that the Mexicans don’t get hurt more often. There are reduced safety rules here in Mexico in comparison to the USA. They do work hard to keep themselves and their team members safe. It would never go in the US.

IMG_6373

Our project list was on our previous blog Shipyard Work, One for the Boys!…#23 if you are interested. Below Dan calls out the projects that they are working on too. As the work progresses, of course, more items are found and/or we add to the list because we didn’t understand their existence when creating the list. I will let Dan tell the story. He wanted to start from the beginning, from when we purchased the boat. So much lead up to our scope of work here in Puerto Vallarta that he felt he needed to start at the beginning. Hang on… it is long list!

Hi Folks
First off, when you purchase a vessel, there is a survey done, which is much like a home inspection. This is important for an older 1980, 80 foot boat like ours. The Survey had about 100 findings, 25 of which needed to be fixed quickly for safety and insurance reasons.  We got a great deal on the purchase price, but knew we bought a fixer upper. The engines were in great shape luckily. Some of the big things I remember were replacing the main batteries – 8 giant 8V batteries for 2 banks of 32V each. About a ton and half of lead and acid. One of the batteries had cracked and had to be cleaned up and acid neutralized. The boat had a number of 12V batteries for navigation systems that were also replaced. Gensets were checked out and ran ok. Fuel filters were changed and many more stocked up. Surprisingly, BILGE PUMPS were not in good shape – some I had to replace, some needed new switches and lots of new wires and connectors.
The boat was hauled out in Richmond CA in March of 2017 to address the 25 findings, including having basic shaft seal and bearing work done. Also many months of shells and growth were removed and bottom paint touched up. Props were cleaned and checked. 

“Fuel in the Bilge is never a good thing”

A leaky fuel tank was found in May, just before our trip to Portland to bring her home. It made a big mess that took a team of friends to clean it up. Bilge water and fuel etc. mixed together that was unusable and toxic for the environment.  We put all that mess in an unused cockpit fuel tank and dealt with that refurbishment in winter of 2017-18. After the big stuff was done, the boat was safe to cruise home from Oakland to Portland. I had to repair the radar after the trip to Portland – it died off Coos Bay.  Got the parts off of eBay, a proven tactic for older boats. We also enjoyed a trip to the San Juans Islands WA in Summer of 2017 before all the big winter work started. San Juan Islands are one of our favorite places to go. 
After summer up North, the Naiad stabilizers were leaking water and grease into the boat, so did a quick haul out in Bellingham for seals and grease. I was also notified that they would need a lot of work later, but they worked well at that point and did not leak. I had to replace a leaking power steering hose also while we were there as one failed right before getting to the shipyard. Then home in time for our first big party aboard her. We cruised to Riverplace Marina for Emily and Taylor’s engagement party. Best friends of our daughter, Kylie. 

The winter of 2017/2018 was when the big projects started. 
  • We had to ID and buy many different filters – over 2 dozen kinds. That data is so big it now lives in Excel spreadsheet
  • Oil and Coolant Rebuilt both Reverso oil change pumps so I could do the oil changes 
    • Purchased lots of  Chevron Delo 100 oil for Engines and Transmissions, as my  2 Detroit Diesel 650 HP 12V71TIs, that take 9 gallons per engine and another 4 for the transmissions
    • 20 gallons of specially treated engine coolant for diesels plus 20 gallons of distilled water to mix with the coolant took care of both engines
    • Another few gallons of 15W40 oil and more coolant mix for the Northern Lights 32KW gensets
    • Each time I changed oil or coolant. I had lots of buckets of waste oil or coolant and used filters to dispose of
    • Have changed oil and filters in the mains and 1 genset one more time since
  • Replaced all the raw water side zincs and impellers
  • Cleaned the sea strainers
  • Cleaned bilges
  • Replaced 240V Air conditioning raw water pump
  • Rebuilt 240V overboard 3HP macerator pump
  • Calibrated stabilizers
  • Emptied and refurbished 2 cockpit fuel tanks
  • Polished and saved 150 gallons of diesel with a home built system of vane pump, Racor filter and 55 gallon drums. (from the fuel leaking incident mentioned above)
  • Installed new gas station pump for dinghy and waverunner. Yes, we have gas for our toys! Correct ventilation blower installed as well for the lazzerette.
  • Rewired navigation light sockets
  • Replaced many old GFCI outlets
  • Rewired the stereo and TVs after the salon makeover
  • Replaced the broken starboard helm windows and cracked Sapphire deck windows with new glass
  • Installed and Integrated a 10kw 240V split phase Victron Inverter System with Ron Micjan’s help on design and sourcing and Angela’s help with the giant 200AH Telecom batteries on the install. 
  • I am sure there is more but you get the drift.  

While I was working on all this Angela was working on the interior updating.  (Upcoming blog in the works!)

Then on June 2018 we started our cruising for this big trip by going North again.  We did small projects like lights and bilge alarms, when at anchor with Ken Williams  enthusiastic help.  A new fresh water pressure tank was procured and installed in Victoria.  We had a dinghy to keep going too but that saga has already been told in multiple episodes —->   #6  &  #7    &  A Dinghy Saga, lemons in paradise….#8  & Our Dinghy’s Final Resting Spot…#17
On the way south to Ilwaco we noted a pinhole exhaust leak from the port engine riser from the exhaust manifold to the turbo. Damaged oil hose too.  Thanks to Dennis Sackhoff for the use of his nice slip, we were able to do the repairs in a nice location. What a pain the work was for me and my hero Ken Williams.  2 bolts broke off in the manifold while removing the broken part, but we were able to drill and tap them out and get the new elbow and hose installed.  With that work done, it made for a flawless cruise from Columbia river to San Francisco Bay in 60 hours with our Son Chase. 
While in California I replaced a satellite dish part called the “LNB” with one for the USA, and got DirecTV working for a while, but then we went to Mexico out of the footprint of the satellite.  We fought generator and inverter problems on the way South to Cabo and Puerto Vallarta. That let us plan our shipyard work.  Again with buddy Ken, we chose the Opequimar shipyard and Jorge Servin with SYS to lead our yard work in Puerto Vallarta.
Most of the work is painting and preservation to beautify and hold the value of the boat.  A bunch is mechanical drive train maintenance at the detailed level. And of course bottom paint and a lot of prep for that.

Here is the work list with a bit of discussion:

Top side painting, Fly bridge to deck including cockpit and cranes

Remove, restore and reinstall dinghy cradles in new positionsThis was done to renew worn non-skid on top deck flybridge for safety, looks, to stop cracks and leaks and to better arrange the toys on top

Clean, scrape, repair bottom with epoxy coat, bottom paint and boot stripe. The old bottom paint was worn out and needed stripping. Blisters and crack repairs were needed to preserve the hull.  2 coats of West System Barrier epoxy will be applied before the Pettit brand hard blue bottom paint.

Upholstery cushions on bow and flybridge. Updating worn and discolored vinyl cushions with Sunbrella. Along with cockpit bolsters. We haven’t seen these yet just pictures in process. 

Varnish railing, doors, flybridge bench seating rails, sapphire deck bench seats.  Many coats! new veneer here and there. Improves looks and preservation of the teak wood. Rebed and repair Bow spray rails. We had a small leak to stop. These were bolted on and we found hidden damage from previous owners. This was causing problems as both the hull and spray rails were cracked and leaking. After good structural repairs with West System epoxy we will have a nice looking, functional bow again.

Repack and install new packing box hoses on main shafts, rebed one strut.  Poor work by a prior yard is being proven out.  I feel a claim coming. Prop shafts and bearings and couplers all being cleaned up and repaired.

Restore pitted rudder shafts, rebed rudder glands, install new bearings. This was to fixing leaking and poorly repaired rudder shaft seals, and replace worn out rudder shaft cutlass bearings 

Complete overhaul of the Naiad Stabilizer Actuators and seals. Chris Ponce had the lead on this for Lance Lage’s MTU team. The stabilizers had begun to ooze grease once again as forecast. As they came apart we could see a complete overhaul was in order. The shafts and numerous other worn parts were replaced and the good parts were stripped and repainted or refinished to new condition.  This was a couple of weeks of very careful detailed expert work that I greatly appreciate. Chris also was a big help with steering leaks, oil hoses and generator exhaust as well.

***Before***

***After***

While the yard team was working, I had my “Dan” Jobs;

  • Wire aft bilge level switch to alarm bell.  We have a school bell now for too high bilge water!  Safety
  • Install new KVH compass and Garmin display unit.  These were replacements of existing units.  Pretty straight install and rewire.
  • Build and install new reverse engineered wireless remote for our old Robertson AP300 Autopilot (Saved $800).  I uses a remote control, like a key clicker with 50 Meter range. This replaced a wired autopilot control. Now we can steer (adjusting the autopilot) from anywhere on boat!  $12.00US!!!  This was awesome and I can’t wait to try it.
  • Added new zincs on swim platform brackets.  Grunt labor for preservation.
  • Refurbish and install our old swim step ladder as designed under the step.  Prior owner had installed with wrong hardware and installed backwards. It now works as designed.
  • Glue and clamp Sapphire Deck table to fix crack.  More wood and varnish work for Dan and Angela. Glue done, now just need to sand and finish.
  • Install new port generator exhaust elbow, and starboard generator shutdown solenoid. More mechanic wrench turning. Solenoid was just me. I got Chris to help on the elbow, just in case. 
  • Fix electrical issues with 32V bow lights and aft hall 12V lights, and panel lights. OMG. Traced wires and grounds and voltages like mad, Determined I had to run new wires for power. Did it. Lots of snaking and crawling and crimping and terminal strips later, they ALL work. Added some new 12V LEDs too.
  • Build and install new heavy duty battery hold down clamp on house batteries.  Determined existing holders were not enough. Built a giant 2′ x 4′ clamp with some 1/2″ threaded rod to hold all the batteries down hard.
  • Clean repair and lubricate all 6 seawater intake strainers, and fix mount on Starboard GenSet strainer. More grunt work in the bilges for Dan. Found 2 strainer screens needing replacement, did so.
  • Install 3 new Turbo drain hoses on main engines. Replaced old ones that had some damage. Installed chafe protection too. Chris helped here too.
  • Fix steering leaky O-rings and hydraulic hoses aft.  I gave this one to Chris and his buddy mostly. I helped find the right non-leaky o-rings. They did all the hard fitting and rebuild work.  All clean and shiny and not leaking.  Sea trial needed to prove but it is holding 30 pounds of pressure nicely.
  • Fix snaps on bow sun shade.  Replaced all corroded canvas snaps with snap tools. We will have new snaps on the cabin as well.
  • Repaint anchor chain depth marks. Drop them on the hard, lay out chain for easy painting, clean out chain lockers, reel back in. Try not to kill anyone. Thanks Angela for your help here too. 
  • Install 2 new searchlights – the old pedestals fiberglassed in. Just need to drill, bed and run new wires and switches, probably after the yard time. Not enough access.
Yes, this is a crazy list of stuff and if you made it down this far, I commend you for sticking with the whole blog! THANK YOU!

Upcoming articles we are working on…

** Interior Remodeling 

&

**Our Final Splash Down after all this work, along with Pics too!!

Thank you for your continued support! If you weren’t reading, we would stop writing!


Shipyard Work, One for the Boys!…#23

Opequimar Shipyard Guys

Living while our boat is in the shipyard is not easy. Long before we put the boat on the hard, we had decided to rent a place to stay other than the shipyard. YES, you can actually stay on your boat way up in the air while it is on blocks on land. We happily decided to find a cheap alternative. A room in a house close to the yard worked great.

We chose Opequimar Shipyard, in Puerto Vallarta, to do the work for multiple reasons. As I mentioned in my post Iguanas, Tigers & Crocodiles… OH MY!!!! …#21  Dan and Ken did shipyard visits. They talked with a lot of folks about the approach, the facility capability, the businesses, accomodations, and restaurants nearby for doing the work and keeping it all organized. The whole picture.  We had a pretty big list of items we wanted done and needed to have a Mexican translator and Project Manager help us. We got that with a recommendation from Dick Markie at Paradise Village Marina with Jorge Servin from SYS.

Dan and I spent the 40ish hours before the haulout preparing for the work on the outside. We moved our stuff from the outside decks to inside. They would be sanding and painting and we didn’t want anything spoiled. Plus we needed it out of their way to facilitate a faster turnaround time.  We also had our Dinghy, Waverunner & motorcycle stored on land. We were having the top deck redone too. Other than doing an outside paint job from the waterline down and 80% above the water line. We had other stuff we needed/wanted done too.

Their Work List:

  • Top side painting, Fly bridge to deck including cockpit and cranes
  • Clean, scrape, repair, epoxy coat then paint bottom and boot stripe
  • Upholstery for bow and flybridge cushions
  • Varnish railing, doors, flybridge seating rails, Sapphire deck bench seats
  • Rebed and repair Bow spray rails, stop small leak
  • Repack and install new packing box hoses on main shafts, rebed one strut.
  • Restore pitted rudder shafts, rebed rudder glands, install new bearings
  • Complete overhaul of Naiad Stabilizer Actuators and seals to near new condition
  • Reinstall dinghy cradles in new positions for safety, list control and access

The crew was expecting us and ready for our arrival at Opequimar (O-pek-i-mar).  They didn’t take long to get her into the slings of the travel lift. Below is Angelique in the sling to move her on the “hard” as us boaters call it.

They moved her on to land and did a quick power wash of the bottom while still in slings. She is setting on blocks of wood that help keep her from moving while they spray off the bottom. Then they moved Angelique to her location in yard and put her on wood platforms and started to put the jack stands on to support her upright. They tie them together across from side to side so they can’t move. Then a simple ladder to climb up the back.

The work began that day, as soon as she was supported, they went to work. 

Dan and I ride our bicycles everyday to work (as Dan puts it). We arrive at the shipyard and Dan does his dirty jobs and works on his project list while the guys are doing their paid for work.

  • Dan Jobs;
    • Wire aft bilge level switch to alarm bell
    • Install new KVH compass and Garmin display unit
    • Build and install new reverse engineered wireless remote for our old Robertson AP300 Autopilot (Saved $800)
    • Zincs on swim platform brackets
    • Refurbish and install swim step ladder as designed under the step
    • Glue, clamp Sapphire Deck table to fix crack
    • Install new port generator exhaust elbow, and stbd generator shutdown solenoid
    • Fix electrical issues with 32V bow lights and aft hall 12V lights, and panel lights
    • Build and install new heavy duty battery hold down clamp on house batteries
    • Clean repair and lubricate all 6 strainers, and fix mount on Stbd GenSet strainer
    • Install 3 new Turbo drain hoses on main engines
    • Fix steering leaky O-rings and hydraulic hoses aft
    • Fix snaps on bow sun shade
    • Repaint anchor chain depth marks
    • Install 2 new searchlights

I help and assist all that I can with Dan’s list of items. I spend time working on other stuff;

  • Angela’s Jobs;
    • Blog writing
    • Keeping us healthy and fed
    • Flat bicycle tire repair shop hunting
    • Talking to varnish & upholstery guys
    • Finding our Airbnb’s to stay in
    • Phone service shopping
    • Moving/covering our stuff on boat so it doesn’t get dirty
    • Cleaning up a bit after them
    • Taking pictures
    • Working on our budget
    • Planning our Kylie/Ryan visit
    • Helping Dan when possible (like snaking wire!)

We keep trying to do some fun stuff too, but the hard work is over shadowing the fun stuff right now. It is important to get it done as quick as possible, it cost us everyday on the hard. AND we want back on our boat and in the water. It is our home now.

After Angelique was pulled out of the water an inspection was done to the bottom. Of course more work was found and identified adding to the length of time on the hard and our budget. Something has to give with the dollars being spent and we will have to give up some of our wants vs needs.

We were told an estimate of 3-4 weeks in the yard. But as I write this blog we are at Day 27 but think we are on the downhill side. It will take longer than 4 weeks, my guess is 6. We are trying to be optimistic with our timeline. But with most projects it isn’t going to hit the target date. Now we have added to the scope. Dan and I had a bet in November before we talked to anyone about the work.. He picked a date and I picked a date…… GUESS WHOS going to WIN!! Our dates were 6 weeks apart. Lets just say I wish I didn’t win.

Pictures of the paint prep, a couple guys

Once back in the water we still won’t be done. There are items that can’t happen in the dusty, dirty shipyard. example: final varnishing of the rails, and placing of the dinghy cradles.

We are really excited to see the completion and a clean boat. That will be a happy day! Watch for our next blog…. ——>>> what was found, what we fixed & what was completed

Adios Amigos, Bueno dia


%d bloggers like this: